Image downloads & refunds
Download your captured images from My Data, and request a refund for defective ones.
Written By StellarDock Support
Last updated 9 days ago
How to download your captured images, and how to request a credit refund for defective ones.
Downloading your images
All image downloads are managed through My Data on your account page.
For iTelescope members
StellarDock does not use an FTP server. Images are accessed directly through My Data in your browser.
Images upload to My Data in real time during your session, but won't appear until the session has finished. Once it ends, everything is available to download within a few minutes.
Go to My Data
Open the Account page and select My Data. It lists all your completed sessions, each showing target name, telescope, date, exposure count, and filter.
Locate your session and click Download Data
Expand a session to see the log and exposure details, then click Download Data in the bottom-right corner.
Choose your download options and start
The Prepare Download dialog (below) offers two output modes and an option to include calibration frames. Pick what suits your session and start.
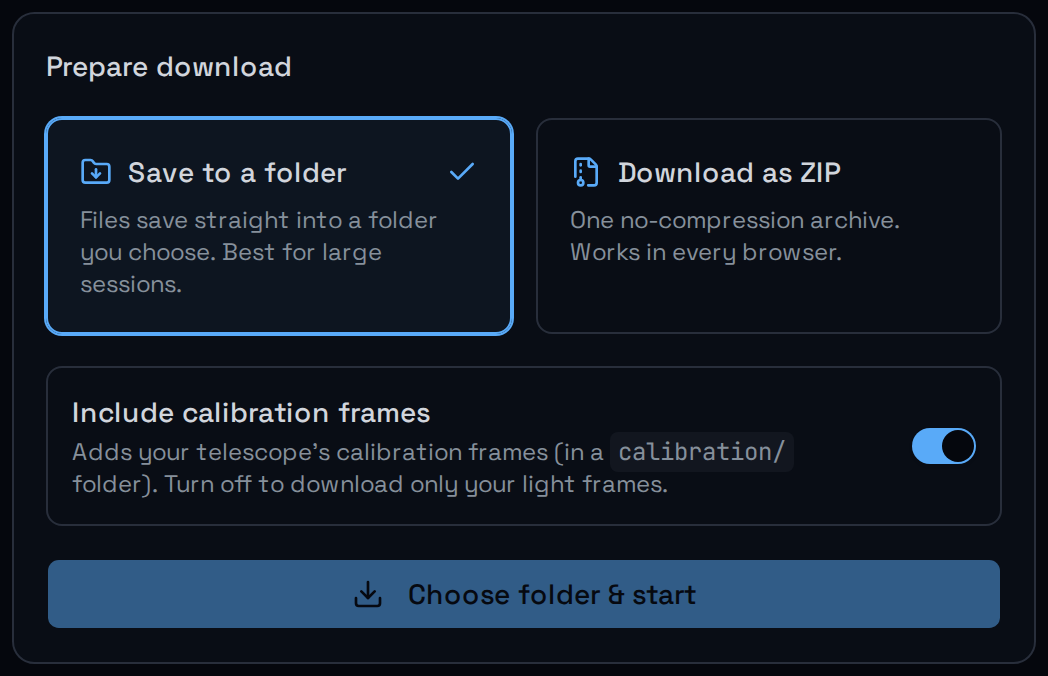
Save to a folder — files save straight into a folder you choose. Best for large sessions. (Chromium browsers: Chrome, Edge, Brave, Arc.)
Download as ZIP — one no-compression archive. Works in every browser.
Include calibration frames — adds your telescope's calibration data in a
calibration/subfolder. Turn it off to download light frames only.
Requesting a refund for defective images
If images from a session are defective, you can request a credit refund directly from My Data. This creates a support ticket reviewed manually by our team — if approved, credits return to your account balance.
Open the session in My Data
Go to Account → My Data and find the session containing the defective images.
Click Request Refund
In the session detail view, click Request Refund.
Select the affected images
Tick the specific images you want refunded.
Describe the issue
Enter a short description — e.g. tracking errors, clouds, or focus drift.
Send
Click Send to submit your request.
Tip
Refund requests are reviewed manually. If approved, credits return to your balance and are available for your next booking immediately. Note this is different from the automatic refund for failed or partial sessions.
Was this helpful?
Still need help? Ask the team